Snow Fall: The Avalanche at Tunnel Creek
26 December 2012
Snow Fall: The Avalanche at Tunnel Creek
An amazing interactive article covering the avalanche that happened in the Stevens Pass area just the day before we last went skiing there.
Yavor is a PM at Snowflake working on developer experience. Previously at Docker, Auth0, Hulu, and Microsoft Azure.
26 December 2012
Snow Fall: The Avalanche at Tunnel Creek
An amazing interactive article covering the avalanche that happened in the Stevens Pass area just the day before we last went skiing there.
21 December 2012
Update: Corrected the server script code snippet.
Update 2:The example below will unfortunately no longer work due to Twitter API changes… I need to update it. In the mean time, our official documentation shows a very similar scenario, so check that out.
As Scott announced earlier today, Mobile Services is celebrating the holiday season by bringing you some cool new features, including the ability to execute scheduled jobs (or “cron jobs”).
"Windows Azure Mobile Services now supports the ability to easily schedule background jobs (aka CRON jobs) that execute on a pre-set timer interval, and which can run independently of a device accessing the service (ensuring that you don’t block or slow-down any requests from your users). This job scheduler functionality allows you to perform a variety of useful scenarios without having to create or manage a separate VM."
Some of the scenarios you can enable with it include:
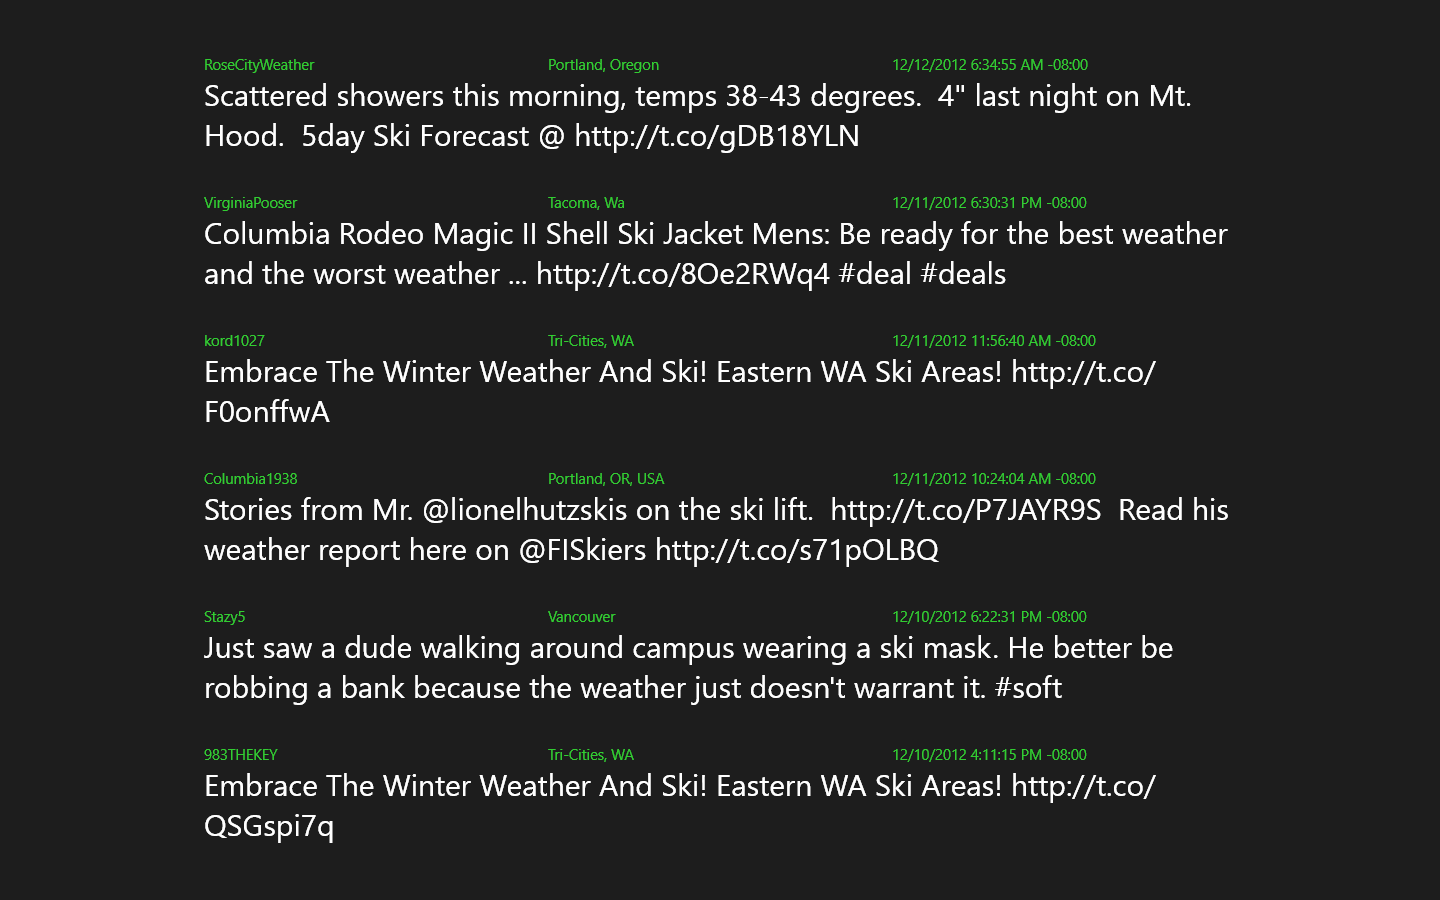
Here I want to give a more detailed demonstration of the feature and celebrate another winter tradition: skiing. Let’s walk through a simple scenario where we will use a scheduled job to aggregate and analyze tweets related to ski conditions near Seattle. The source code is available here.
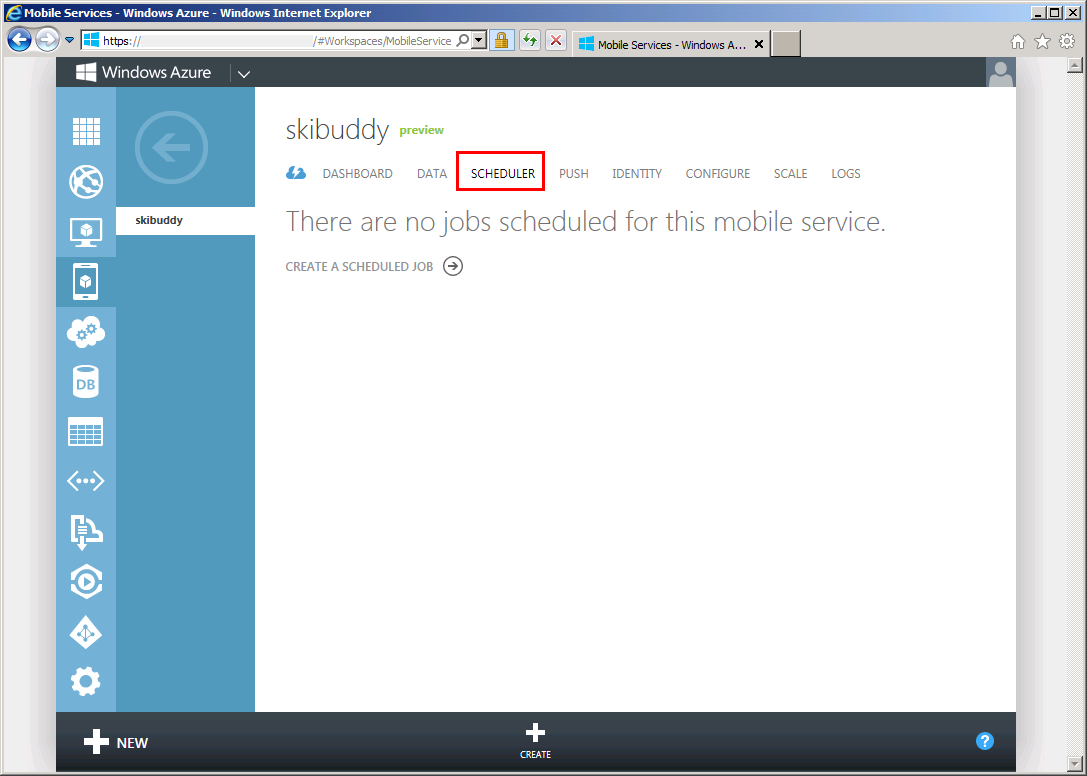
Let’s assume we already have a mobile service called skibuddy. We can navigate to the new Scheduler tab in the Windows Azure portal to create a scheduled job.
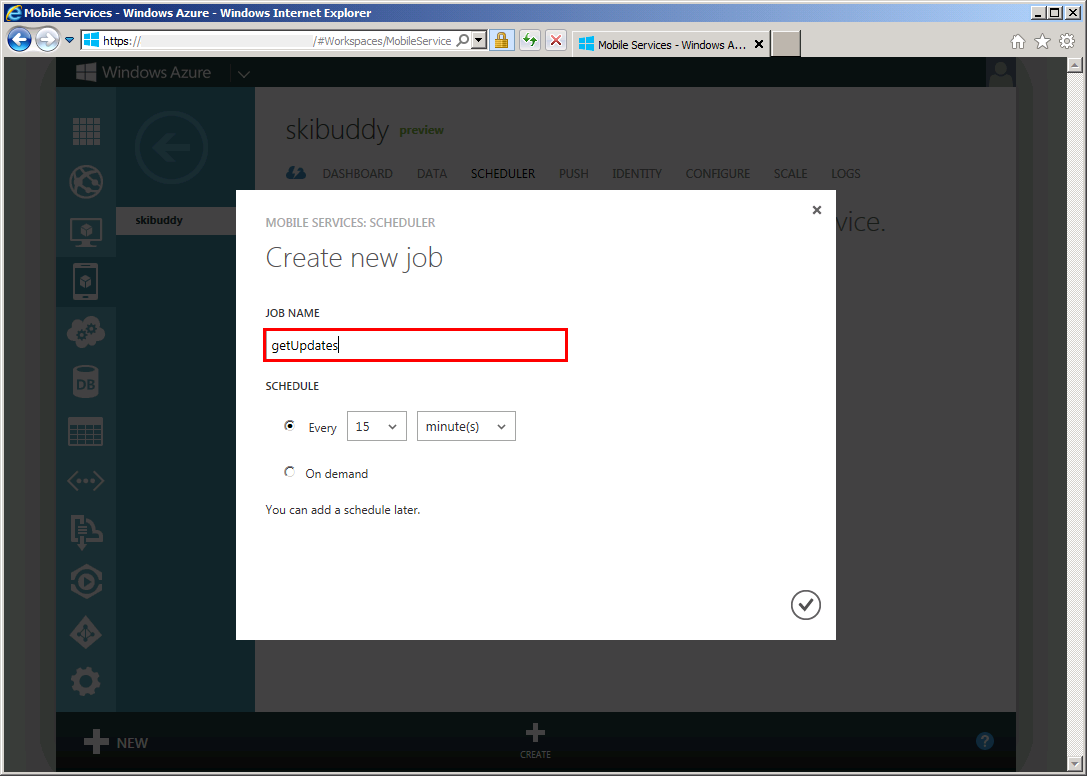
Let’s go ahead and create a job called getUpdates. We will use the default interval of 15 minutes that is already selected in the dialog.
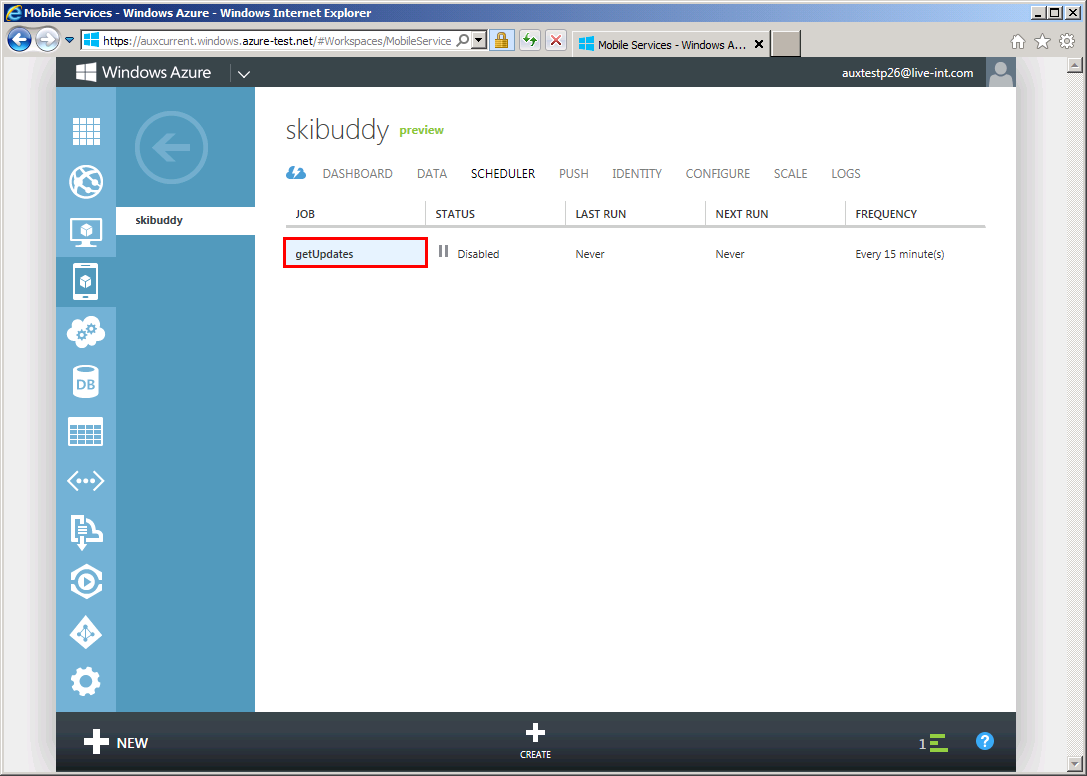
Once the job is created we will now see it in the summary view. You will note that the job starts off as disabled, so let’s click the job name to add our script.
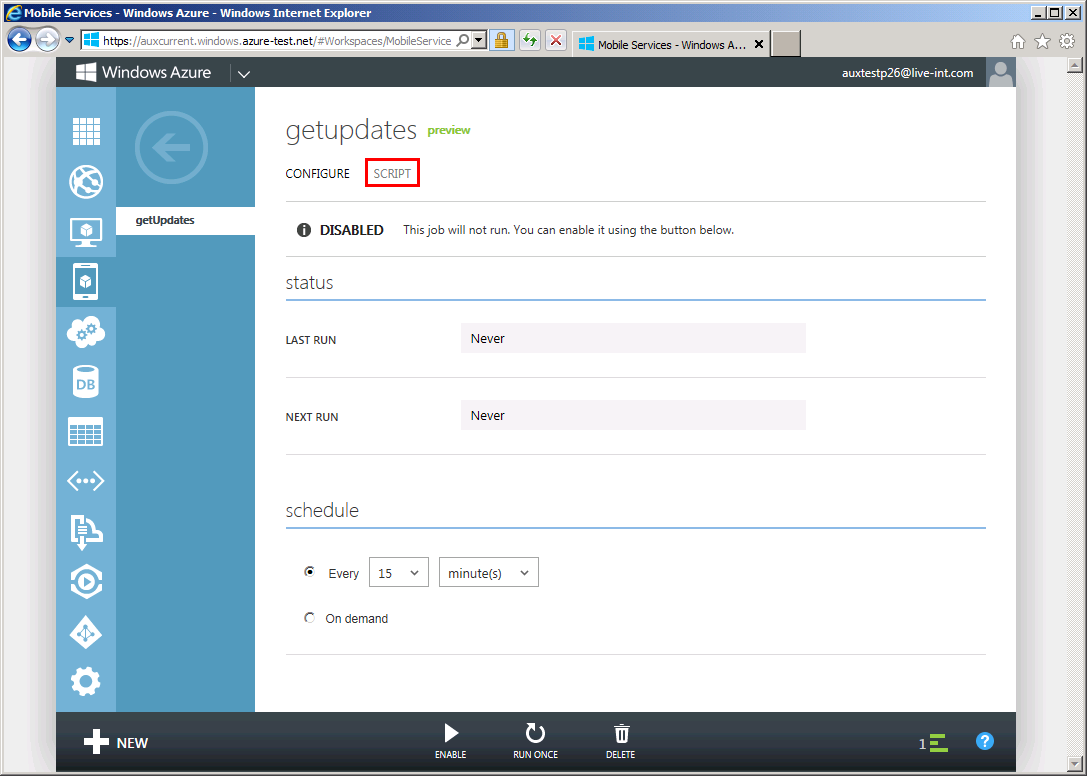
On the job details page, we see information about our job and also we also have an opportunity to change the schedule. For now let’s leave everything as-is and navigate over to the Script tab.
Here we see the script editor window that has been pre-populated with a default empty script.
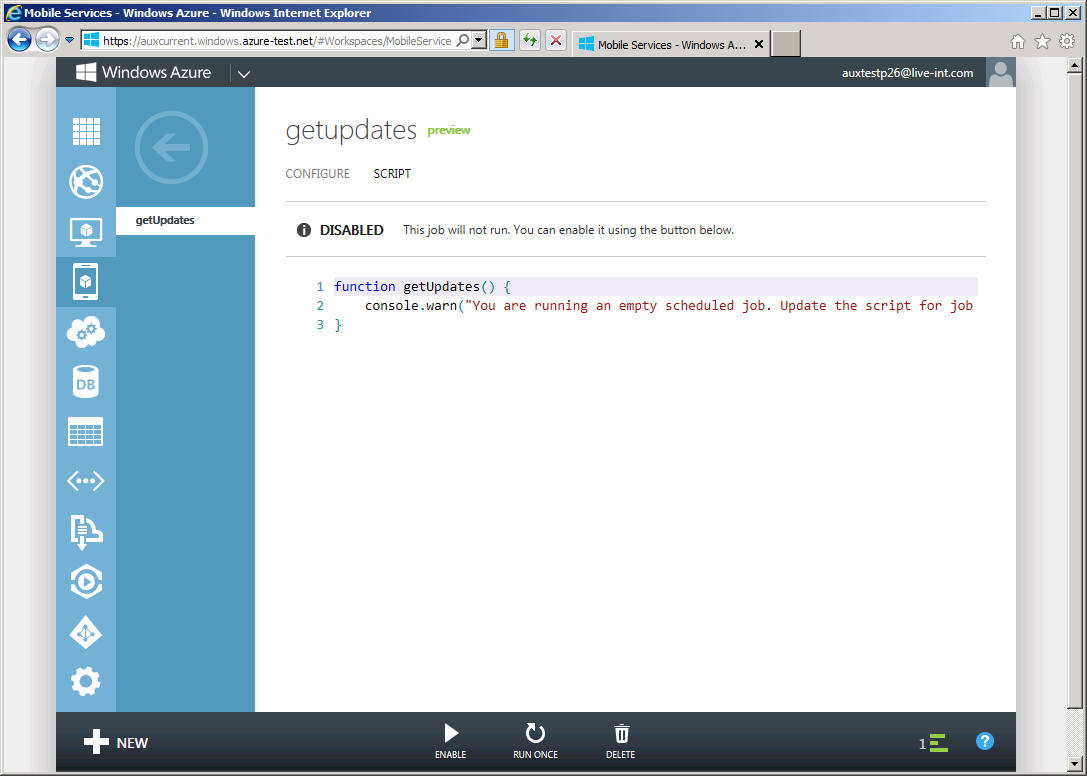
Let’s replace the default script with the following one.
~~~ javascript var updatesTable = tables.getTable(‘updates’); var request = require(‘request’);
28 November 2012
I had a great time in Milan, covering how to write lightweight apps on Azure. We showed how to write a mobile game using Azure Mobile Services and how to write a more involved Node.js app using Azure Websites.
Here are links to the demos I showed:
Hope you find this useful!
08 November 2012

I’m very excited to be speaking at the upcoming WPC conference (@wpc_2012) in Milan on November 20-22. My first session is an overview of the Windows Azure SDK and I’m co-presenting that session with Francesco Diaz (@francedit), who introduced me to the conference and made it possible for me to attend. In my second talk, I will focus on writing lightweight apps on Azure using Node.js and Mobile Services. Here are the two abstracts, also you can check the agenda page for more information. I’m excited about my talks and looking forward to making new friends in Italy!
CI3009 - Windows Azure SDK : Present and Future
Windows Azure SDK and the tools offer a great option for developers to work with different languages in the same platform. Join our session to see .NET, PHP, Java, Python, Node.js working together in Windows Azure. Understand how the SDK is evolving and see the roadmap of the platform.
Level: 300
Track: Cloud & Integration
Speakers: Francesco Diaz Yavor Georgiev
CI3018 - Catching up to startups: Lightweight app hosting in Windows Azure
You think Heroku or Parse offer the easiest and fastest way to get started with an app in the cloud? Think again… Windows Azure has added some exciting new features that make it as fast and agile as its most hip competitors. Come learn how to host Node applications in Azure websites and virtual machines using only a text editor and some command-line tools… even from a Mac. We will also show how to develop a backend for your Azure mobile app in minutes, whether you are using Windows 8, Windows Phone 8, or even IOS. This session will be full of great open-source technologies and will also give you a peek at the team’s plans going forward.
Level: 300
Track: Cloud & Integration
Speakers: Yavor Georgiev
07 November 2012
I’ve created a small prototype of how streaming logs in Azure could work.
Debugging a running app in the cloud is one of the harder aspects of Azure websites, since you cannot directly connect to the VM where the app is running and look at the logs in real time. Azure already lets you download the logs over HTTP or FTP, but getting all the entries and having to manually diff them makes them impractical for development-time debugging. The ideal experience you want is to be able to directly stream the console output down to a local console window, so you can easily see the entries as they are happening. Heorku and other cloud hosters already allow you to do this, and now you can enable similar functionality on Azure as well!
Check out the video for a walkthrough, than dive into the project straight on GitHub.
07 October 2012
Thanks to everyone who attended, hope you found this useful. Let me know if you have any feedback so we can make this workshop better in the future.