Ski weather app with the new Mobile Services scheduler
21 December 2012
Update: Corrected the server script code snippet.
Update 2:The example below will unfortunately no longer work due to Twitter API changes… I need to update it. In the mean time, our official documentation shows a very similar scenario, so check that out.
As Scott announced earlier today, Mobile Services is celebrating the holiday season by bringing you some cool new features, including the ability to execute scheduled jobs (or “cron jobs”).
"Windows Azure Mobile Services now supports the ability to easily schedule background jobs (aka CRON jobs) that execute on a pre-set timer interval, and which can run independently of a device accessing the service (ensuring that you don’t block or slow-down any requests from your users). This job scheduler functionality allows you to perform a variety of useful scenarios without having to create or manage a separate VM."
Some of the scenarios you can enable with it include:
- Periodically purging old/duplicate data from your tables.
- Periodically querying and aggregating data from external web service (tweets, RSS entries, location information) and cache it in your tables for subsequent use.
- Periodically processing/resizing images submitted by users of your service.
- Scheduling the sending of push notifications or SMS messages to your customers to ensure they arrive at the right time of the day.
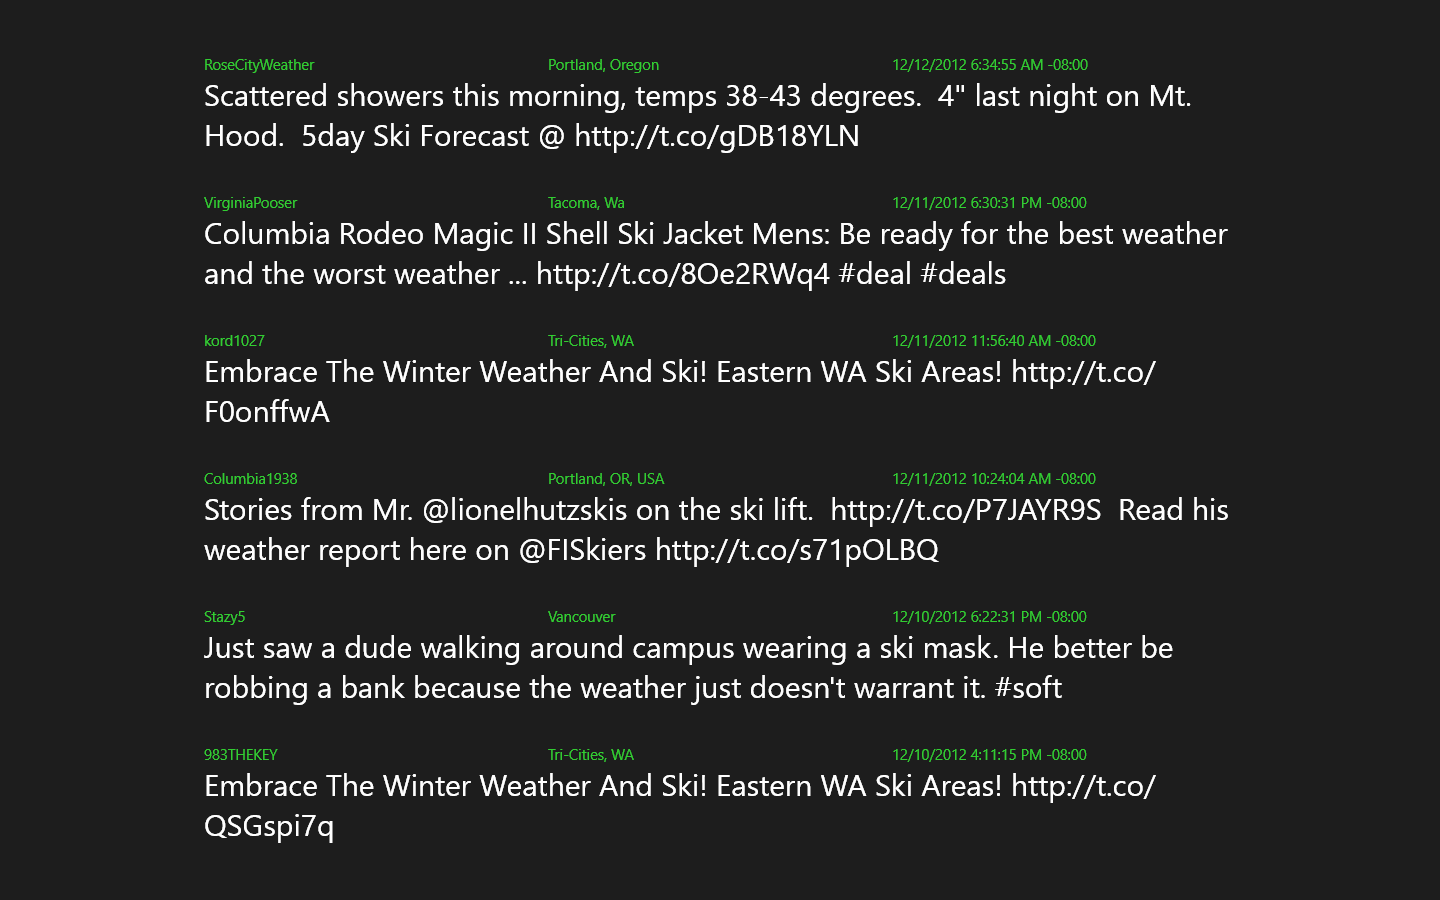
Here I want to give a more detailed demonstration of the feature and celebrate another winter tradition: skiing. Let’s walk through a simple scenario where we will use a scheduled job to aggregate and analyze tweets related to ski conditions near Seattle. The source code is available here.
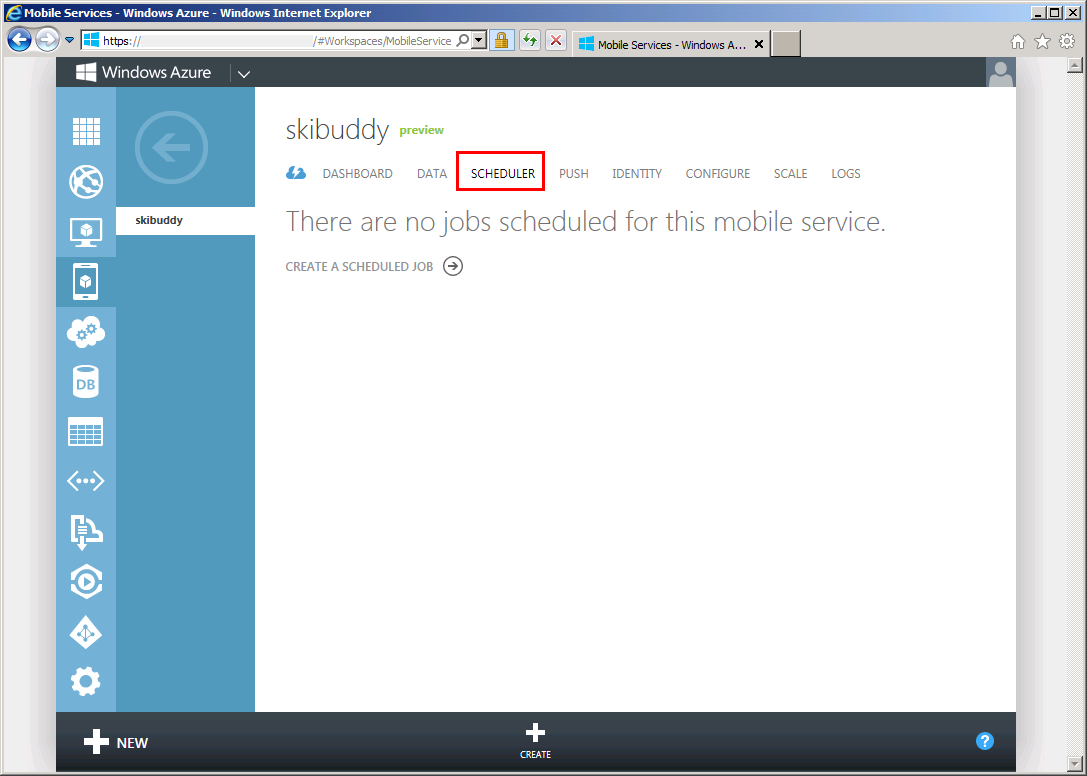
Let’s assume we already have a mobile service called skibuddy. We can navigate to the new Scheduler tab in the Windows Azure portal to create a scheduled job.
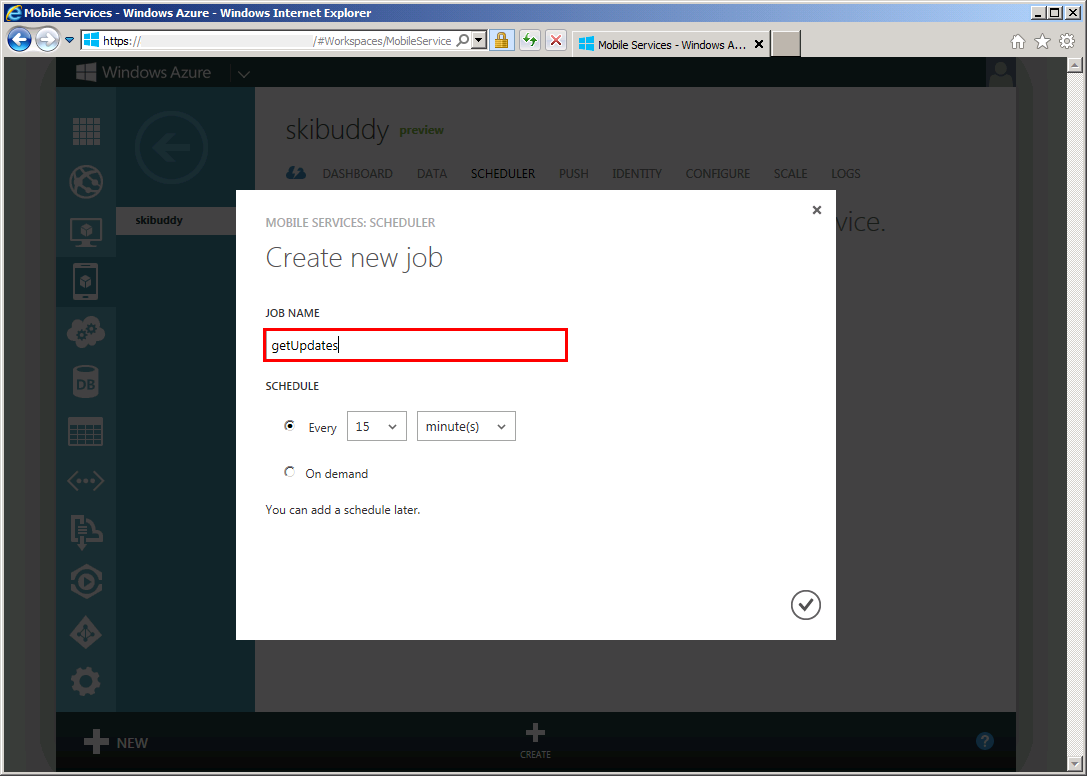
Let’s go ahead and create a job called getUpdates. We will use the default interval of 15 minutes that is already selected in the dialog.
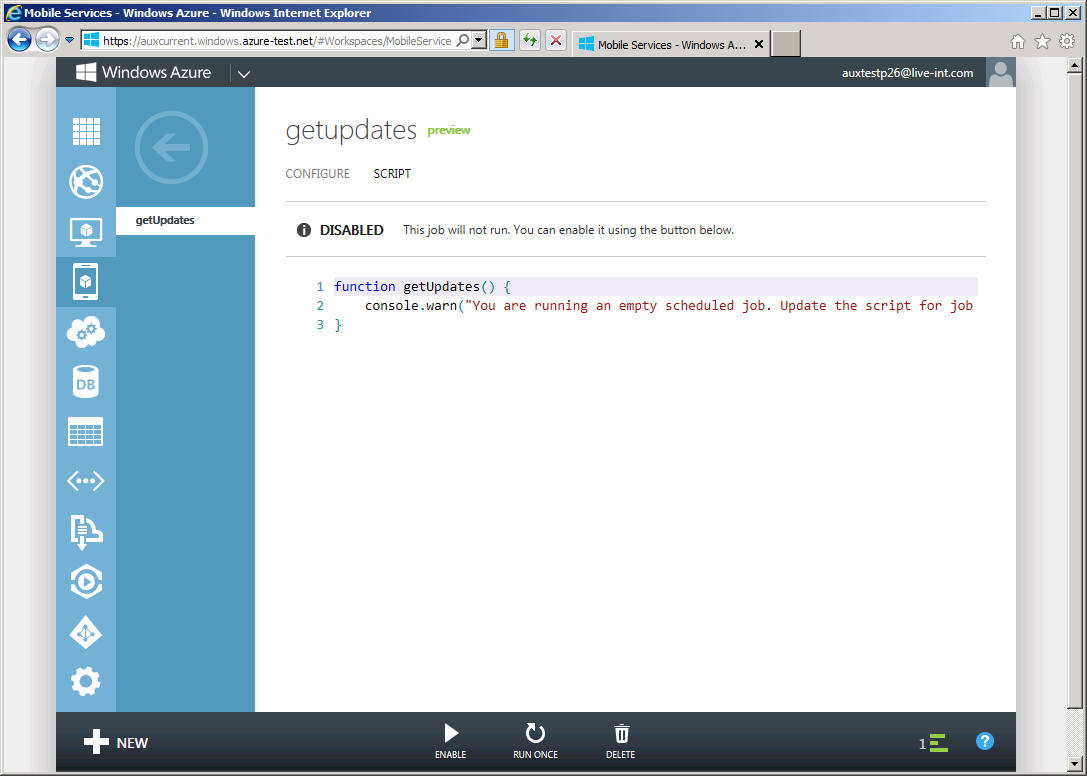
Once the job is created we will now see it in the summary view. You will note that the job starts off as disabled, so let’s click the job name to add our script.

On the job details page, we see information about our job and also we also have an opportunity to change the schedule. For now let’s leave everything as-is and navigate over to the Script tab.

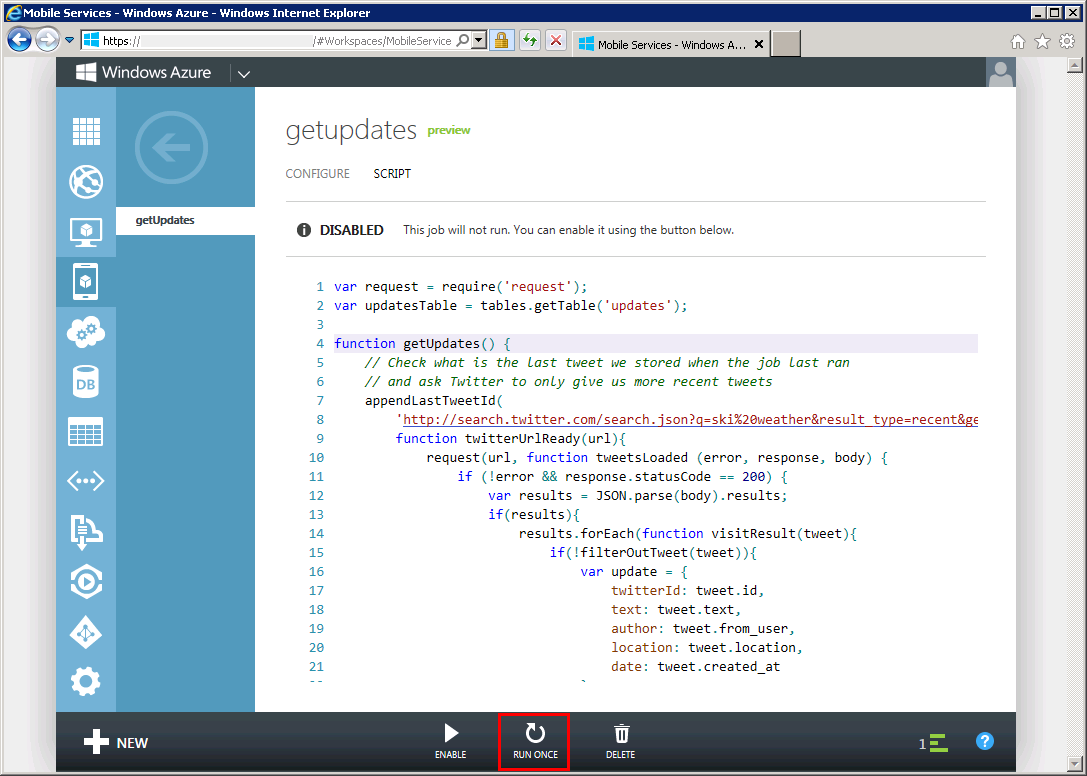
Here we see the script editor window that has been pre-populated with a default empty script.
Let’s replace the default script with the following one.
var updatesTable = tables.getTable('updates');
var request = require('request');

function getUpdates() {
    // Check what is the last tweet we stored when the job last ran
    // and ask Twitter to only give us more recent tweets
    appendLastTweetId(
        'http://search.twitter.com/search.json?q=ski%20weather&result_type=recent&geocode=47.593199,-122.14119,200mi&rpp=100',
        function twitterUrlReady(url){
            request(url, function tweetsLoaded (error, response, body) {
                if (!error && response.statusCode == 200) {
                    var results = JSON.parse(body).results;
                    if(results){
                        console.log('Fetched new results from Twitter');
                        results.forEach(function visitResult(tweet){
                            if(!filterOutTweet(tweet)){
                                var update = {
                                    twitterId: tweet.id,
                                    text: tweet.text,
                                    author: tweet.from_user,
                                    location: tweet.location || "Unknown location",
                                    date: tweet.created_at
                                };
                                updatesTable.insert(update);
                            }
                        });
                    }
                } else {
                    console.error('Could not contact Twitter');
                }
            });

        });
}

// Find the largest (most recent) tweet ID we have already stored
// (if we have stored any) and ask Twitter to only return more
// recent ones
function appendLastTweetId(url, callback){
    updatesTable
    .orderByDescending('twitterId')
    .read({success: function readUpdates(updates){
        if(updates.length){
            callback(url + '&since_id=' + (updates[0].twitterId + 1));
        } else {
            callback(url);
        }
    }});
}

function filterOutTweet(tweet){
    // Remove retweets and replies
    return (tweet.text.indexOf('RT') === 0 || tweet.to_user_id);
}
Here is what the script does:
- First, the script goes out to the Twitter API and collects tweets from Seattle’s geographical area. Because we don’t want to get the same tweets over again, we check if a given tweet has already been fetched and only ask Twitter for newer tweets.
- Once we collect the tweets we process each tweet to remove retweets and replies. You can imagine this logic being a lot more complex and adding deeper analysis.
- Lastly, we store the results in a table called updates, which we have pre-created. You can easily create the table yourself by going back to the main page for your mobile service in the portal and using the Data tab. You don’t have to use tables in your scheduled job. You could just as easily send a push notification to users of your app alerting them of new updates from Twitter. For more information, see this tutorial.
Now that we’ve entered the script, we can press the Save button and then select Run once to execute a trial run. The Run once functionality lets you easily test out your job script before you enable the job for recurring execution.
Once you run the script, head over to the Data tab on the main page for your mobile service and select the updates table.

You should see it has now been populated with the tweet data we fetched in our job. Our mobile clients can now read the data from that table and display it to their users.
Next, open the Logs tab from the main portal page for your mobile service.
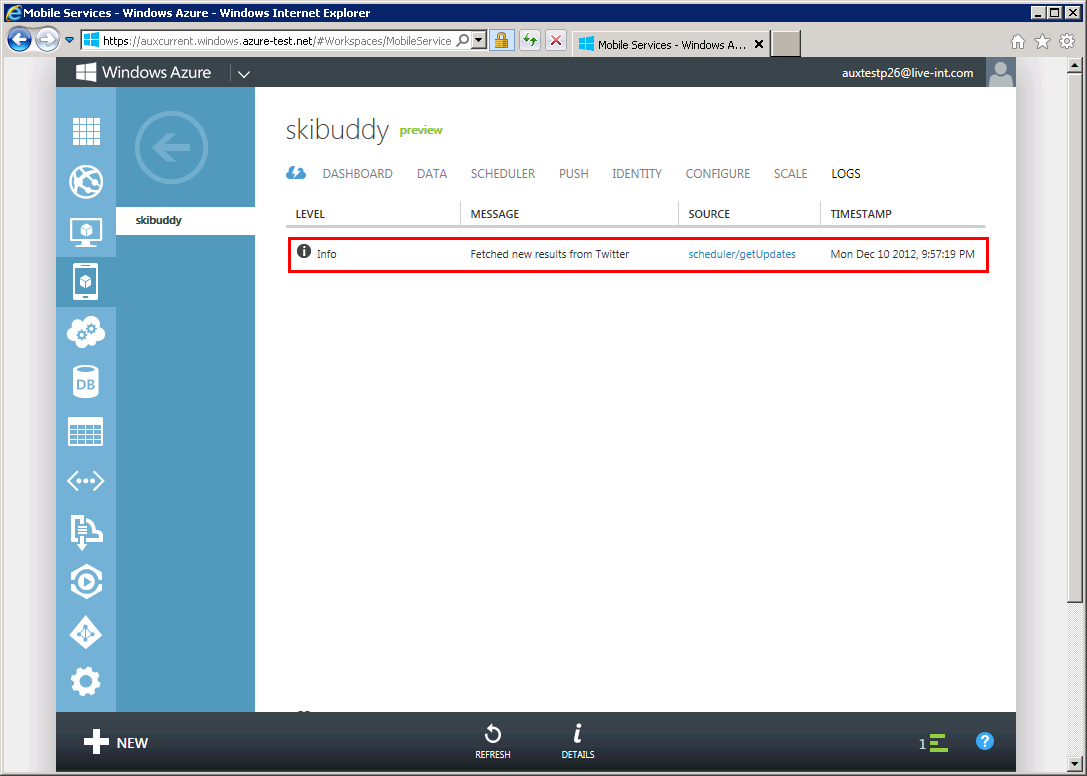
You should see an entry generated by our scheduled job script. Any calls to the console API from your job script and all errors generated by that script will be logged here. This makes the Logs table very useful while debugging and monitoring your scheduled job.
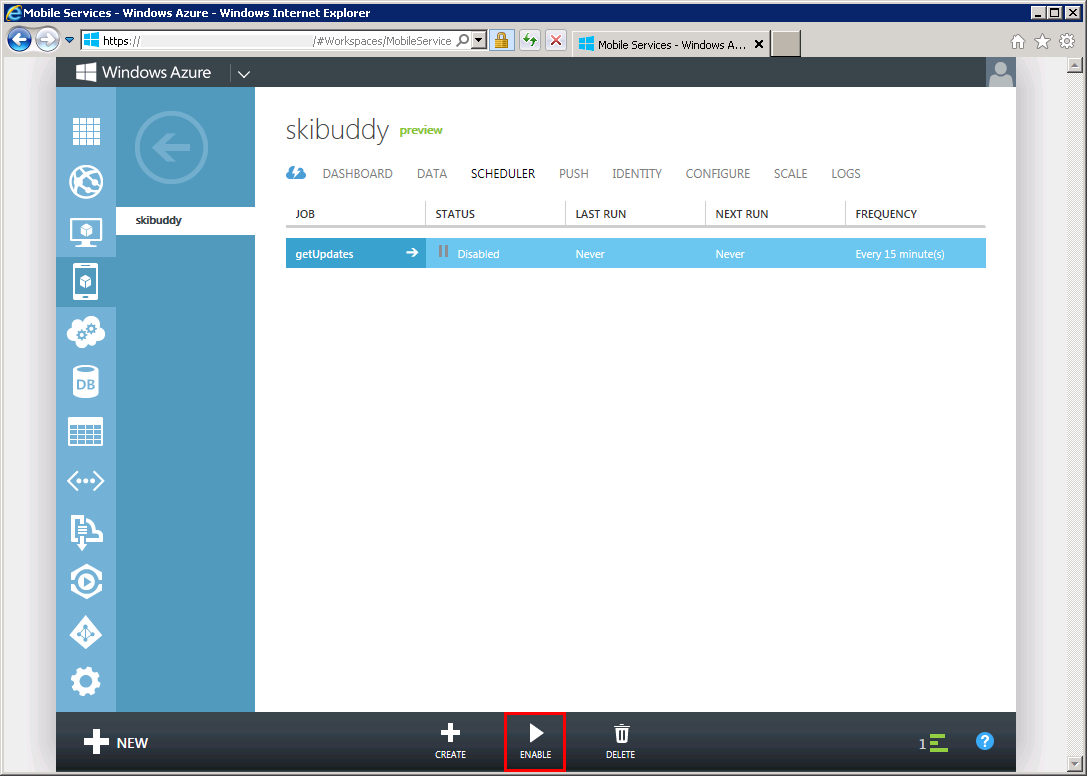
Now that we have made sure the job is working as expected, we are ready to enable it. We can go back to the Scheduler tab, select our job, and click Enable.
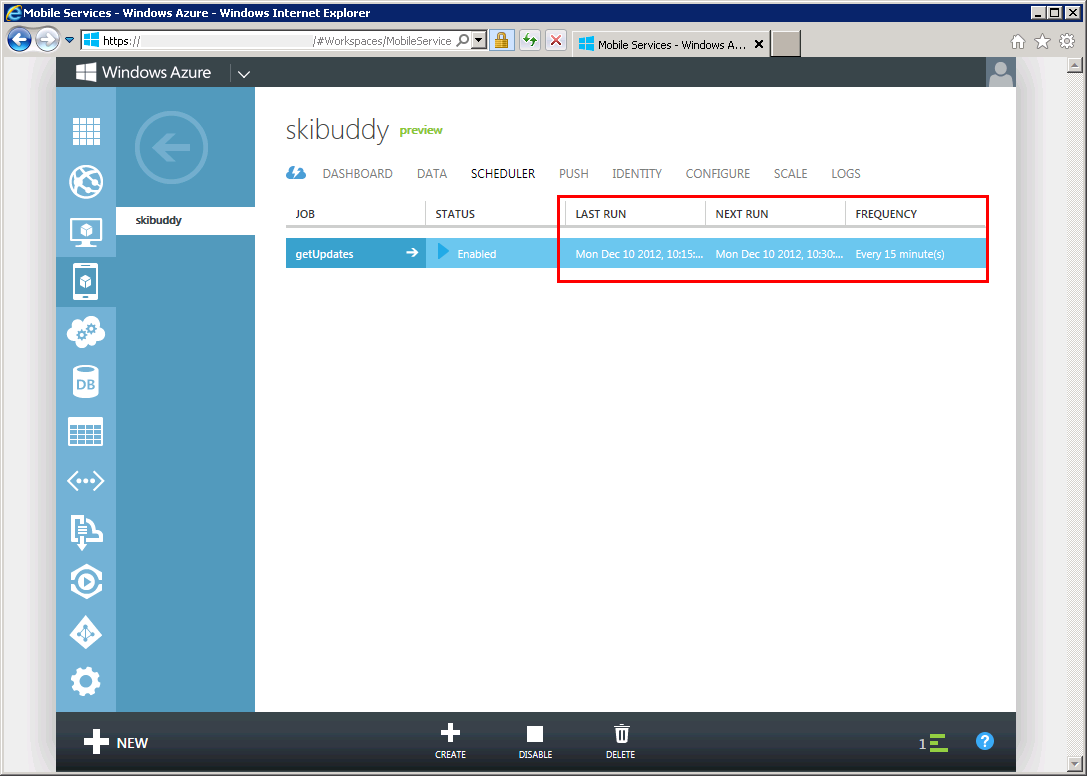
Once the job has run for a while, we can check the updates table and also the logs to ensure it is executing. If we return to the Scheduler tab, it conveniently provides last run and next run data for the job.
This was a quick overview of the new scheduled jobs feature in Mobile Services. I’ll skip the rest of the app implementation as it has been covered many times, you can find the source at the GitHub link above.
Here are some extra details on the feature that we didn’t get to cover:
- If you select On demand for the job schedule, the job will never automatically run and will always stay disabled. You can manually run the job via the Run once button. This is useful for implementing one-time setup and cleanup scripts for your service, especially in development.
- Different schedules are supported, including minutes, hours, days, and months.
- By default mobile services users in free mode are allowed to create 1 scheduled job. If more jobs are needed for your scenario, upgrade your mobile services to reserved mode via the Scale tab, and you will now be able to create up to 10 jobs.